eConfirmations Report
When new eConfirmations are available, you and designated team members are notified by email. You’re directed to the eConfirmations Report within your Portal to view travel bookings made by travel companies and virtual card providers.
Watch the video on how to access your eConfirmations Report.
To access your eConfirmations Report:
- Login to your Portal.
-
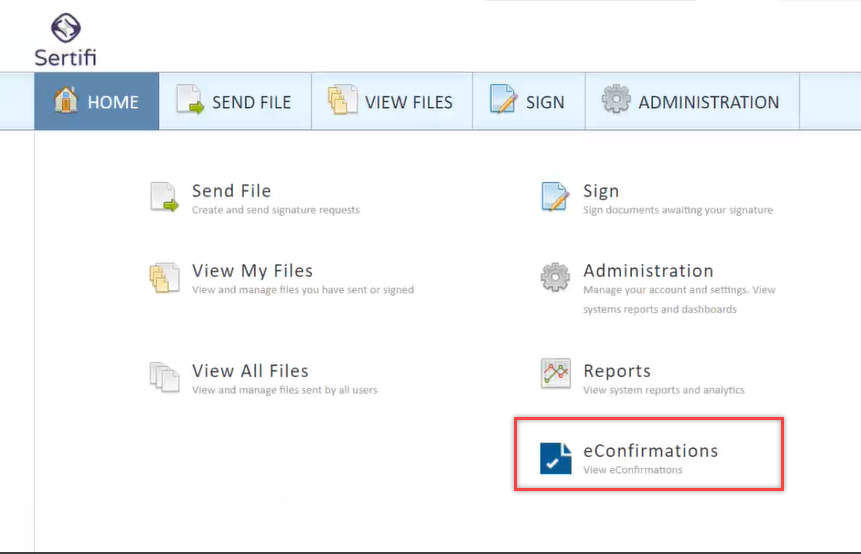
Navigate to Home and click eConfirmations.
- Note that the eConfirmations Report appears only for Super and Power Admins.
- When new eConfirmations are available for review, you'll see an icon with a red exclamation point on your main portal page.

- When there are no new eConfirmations, an icon with a green checkmark will appear on your main portal page.


The report shows a centralized list of all eConfirmations. Here, you can filter the report to only view eConfirmations by:
- Transaction ID Number
- Confirmation Number
- Guest Last Name
- Guest First Name
- Signer's Email Address
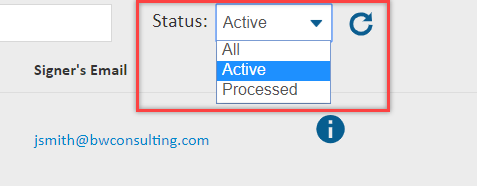
- Processed
- Active
Use these fields to easily search for specific eConfirmations.

You can also sort the report by clicking the name of each column within the report to sort alphabetically.
- Transaction ID - the identifier of the transaction.
- Status – Active or Processed.
- Created Date – the date the authorization form was submitted.
- Confirmation # - the confirmation number of the reservation.
- Guest Last Name – the last name of the guest on the reservation.
- Guest First Name – the first name of the guest on the reservation.
- Arrival Date – the guest’s arrival date.
- Signer’s Email - the email of the signer of the document.
Access Payment Data
To view payment data for individual eConfirmations:
- Click the blue information button on the right to view more detailed information.
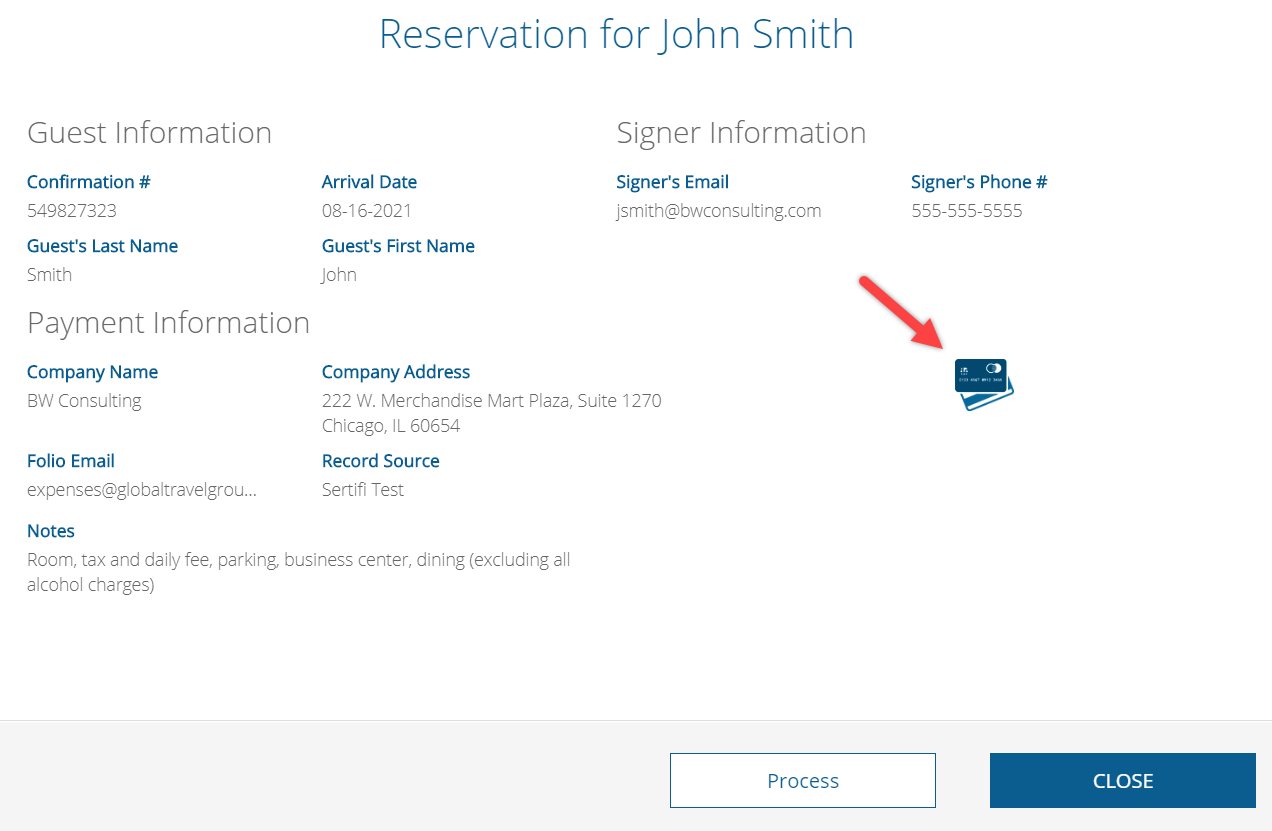
- Once you click the blue information button, the Reservation Window will appear. The Reservation Window shows the Guest and Payment Information.
- It’s important to point out the Record Source so you know which travel management company, virtual card provider, or other travel company sent you the eConfirmation, Notes for specific payment instructions regarding any approved and/or restricted charges, and Folio Email – so you know who to send the guest’s folio to upon check out.


- Click the blue credit card icon to view payment data.
- Now, you must enter a verification PIN.
- This unique PIN is sent to you via email.
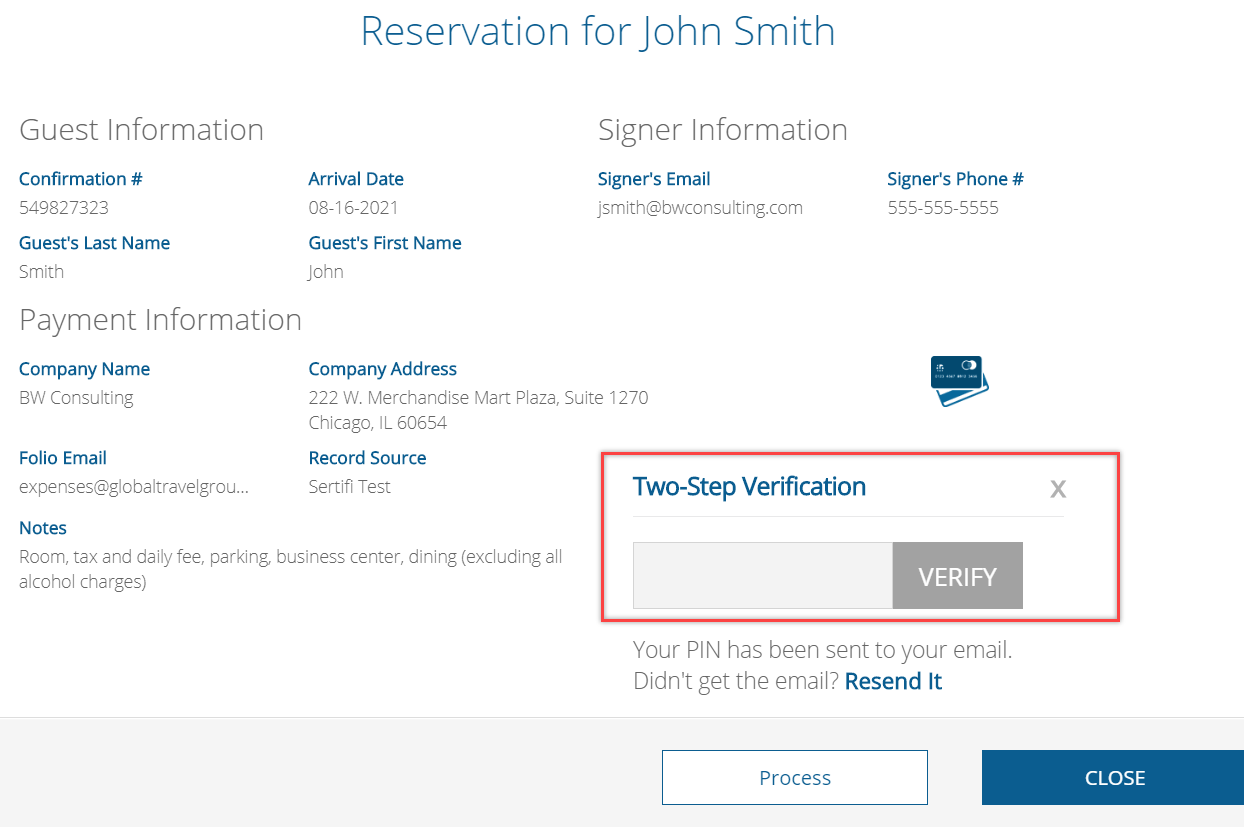
-
Click Verify.
- After completing the two-step verification, the payment data will appear, and you can transfer it your PMS.
- Note:With the standard solution, Sertifi stores data for a set period of time before it's removed from the system. Extended payment data visibility and storage is available via upgrade. Contact [email protected] for more information.

-
Once you transfer these details to your PMS, click Process to mark the eConfirmation as processed.
- Within your eConfirmations Report, this will update the Status from Active to Processed.